
I had the privilege of cooking some pulled pork for a Relay for Life team last week. I had more meat too cook than I had room in my vertical smoker, so I thought it would be a good opportunity to try out a method I recently learned about from Aussie Griller on YouTube — the BBQ Snake Method.
 The BBQ Snake Method

Judging by many of the comments on the video, people don’t have much faith in this method. It seemed to make a lot of sense to me. It looks just like lighting a fuse and letting it slowly burn. A slow burn is the goal.
You set up the snake by place unlit charcoal two pieces wide by two pieces deep right along the outside wall of your kettle style grill. Place chunks of you favorite type of smoking wood on top to slowly burn as the fire moves along the snake. I’ve seen this done going 3 wide and 3 deep, but 2 by 2 created plenty of heat for me on this over-sized grill.

Start a half dozen or so coals in your chimney starter. When the coals are ashed over, pour them at the beginning of the snake. Place them carefully so that you don’t start too much of the snake too quickly. You could also use a paraffin starter cube right at the beginning on the snake. Be sure to let the starter cube burn completely to prevent any off flavors from the wax.
Place a foil pan on the bottom grate to catch drippings. I added some boiling water to the pan to help regulate temperature.

Place the top grate onto the grill and put your meat above the foil pan.

Place the lid on your grill with the vents on the opposite side from the snake. Keep the top vent open all the way. If you have bottom vents, open them about 3/4 of the way. We’ll wait for the smoker to get up to the desired temperature before messing with the vents. I don’t have any bottom vents so there is already limited air flow into the smoker. I made sure to crack open the bottom edge of the lip closest to the snake to let air in. The top vent stayed open all the way for the entire cook.
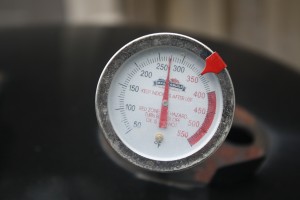
I was able to maintain temperatures between 250 and 300 degrees without any real adjustment. The smoker hung out at 275 most of the time. The amount of coals pictured above lasted about 4 hours cooking at this temperature. When I realized the snake wasn’t going to last long enough, I pulled the top grate off and made the snake longer. When I put the lid on, I turned it so the top vent was on the opposite side of the snake.

This pork shoulder was on the smoker for 7.5 hours before it reached 195 degrees. I pulled it at that point and wrapped it in foil to let it rest for an hour. When I went to pull it, the bone came right out cleanly and I was able to shred it with my hands. This was some of the best pulled pork I’ve ever cooked. You can bet that I’ll use the snake method again.
Some facts about this cook and the method:
- I cooked on a 28 inch diameter fire pit grill. This is quite a bit larger than a standard Weber kettle. You may have to make some adjustments to get it to work perfectly for you (although Aussie Griller did use a 22 inch kettle for his video)
- Since the snake goes around a significant distance around the outside edge of the grill, you have somewhat limited cooking surface. On my large grill, I could probably do 2 or 3 pork butts at a time, but on a kettle grill, you’re probably limited to one.
- My grill is shallower than a kettle grill so my wood chunks held the cooking grate up just a little bit. This helped me keep the lid cracked to let air in.
- I used a thermometer with the probe in the air behind the pork butt to gauge my cooking temp.
- If you find that the side of your meat facing the snake is getting cooked too fast, you can place a folded piece of aluminum foil under that side to act as a heat shield. I didn’t need it, but was ready just in case.
- This method produced more consistent heat than my vertical propane smoker generally does. That’s is very impressive to me.
- For those of you without dedicated smokers, this is a great way to try out authentic barbecue without investing any money.


